Welcome to our website !

Chinese Style scrambled eggs

I thought it apt to share one of my favourite dishes with you for Kitchen Exile's 12th birthday. I came across this dish while travelling around China many years ago. It's not a complicated dish, but the marriage of tomatoes and soy sauce with the eggs is delicious. It's become one of my favourite breakfast/brunch dishes. I used to call it "Chinese train eggs" as I was on a train the first time I had it and had to know what the recipe was, luckily the guide managed to find out for me. 

To those of you who have been following my food journey all these years, a huge thank you! I hope you are enjoying the trip and the recipes. 

Serves 2 people, I usually aim for 2 eggs and 1 tomato per person


4 eggs beaten

2 tomatoes, hulled and roughly chopped
2 spring onions, whites finely chopped and green cut on the diagonal 
15ml dark soy sauce
10ml oil for frying

In a pan on medium heat, add the tomatoes and the whites of the spring onions and cook until they have softened and have dried out a little

Turn up the heat and add the eggs and mix well with the tomatoes in the pan

Add the green from the spring onion and the soy sauce and continue to cook for a further five minutes, stirring constantly

All that's left for you to do is plate up and enjoy

Roast sardines with tomato and piment d'espelette

Celebrating the last of the tomato season which was much extended this year. This is a great simple dish which is easy to put together and place on the grill, without the worry of the fish sticking to it. You will however need a perforated vegetable grill tray. This makes it easier to cook the dish on the barbecue. If you are using your grill in your interior kitchen then use a baking sheet with oiled tin foil.

4 sardine fillets

2 tomatoes sliced thinly

1 small red onion thinly sliced

5g piment d'Espelette powder

Salt and pepper to taste

20ml olive oil 

Set your barbecue up for direct cooking at 200c or set your indoor grill to medium

Oil the bottom of the vegetable tray (or tin foil on the baking sheet if cooking indoors) 2- 3 tomato slices on the tray or sheet depending on the size of your sardine fillets

Place the sardines on the tomatoes skin side down, and season with salt and pepper

Sprinkle over the piment d'Espelette, the oil and the onions 

Cook for 10 minutes and enjoy


Brioche pain perdu with fig leaf

Taking pain perdu up a notch with a rich brioche version. I use the fig leaves to infuse the base egg and milk mix, they have a wonderful "toasted coconut" like flavour. 


10 slices brioche (Stale is better for this recipe)
2 eggs
100ml milk
10g caster sugar

Pinch of Salt
30g unsalted butter
5 slices nectarine
5 fig leaves stem removed and roughly crushed to bring out the aromatics


Beat the eggs together in a bowl, add the milk, salt and sugar, stir to combine
Add the fig leaves and place in the fridge overnight to allow the flavours to infuse
Next day, remove the leaves
Heat the butter in a heavy bottomed frying pan
Soak the slices of brioche in the egg and milk mix and add to the pan
Cook in a medium heat for 3 minutes each side or until nice and golden


Pesto au basilic, persil et ciboulette

 Le pesto est une recette facile à réaliser. C'est parfait quand on a trop de basilic dans son jardin à cette période de l'année. Pour moi, il évoque l'été et se marie parfaitement avec de nombreuses viandes, légumes et poissons. On ne l'utilise pas seulement pour les pâtes. Il se conserve bien au réfrigérateur pendant quelques semaines et j'aime en préparer une grande quantité pour en avoir sous la main si j'ai envie d'un plat rapide. J'ai légèrement modifié la recette traditionnelle en y ajoutant de la moutarde de Dijon et j'utilise principalement du parmesan plutôt que du pecorino ; je trouve que la moutarde fait ressortir le goût du fromage.


1 gousse d'ail (à faire tremper dans de l'eau bouillante pendant 2 minutes pour éliminer le côté cru)
100 g de parmesan râpé
50 ml d'huile d'olive
jus d'un demi-citron
sel et poivre
100 g de feuilles de basilic frais
20 g de persil 
10 g de ciboulette
1 cuillère à café de moutarde de Dijon
50 g de pignons de pin ou de noix

Fouettez tous les ingrédients ensemble dans un robot culinaire, ou si vous souhaitez le préparer de manière traditionnelle comme je le fais parfois, vous pouvez utiliser un mortier et un pilon

Harissa wings

Since it's Kitchen Exile's 10th anniversary I thought it would be a good excuse to bring you a new recipe or two! Hard to think it's been a whole ten years already, they certainly have flown by. Looking through the website I've managed to write 400 recipes, I never thought there would be so many. I certainly hope you've enjoyed them and it's always good to get feedback from you. I'd like to thank you all for your support over the past 10 years. 

Many of you know I'm a big fan of chicken wings and I wanted to try something a little different rather than old school barbecue style. The rub is very summery in style and complements the harissa quite nicely and you also get a nice kick from the piment d'Espelette. 


Recipe
8 chicken wings
10ml oil for cooking

Rub
2g tomato powder
2g piment d'Espelette
1g oregano
1g celery salt
2g smoked paprika
5g dried onion flakes

Mix all the ingredients together and rub all over the chicken wings.
Cover and place in the fridge and allow to marinate for at least 12 hours

Harissa paste
2 red peppers
2 cloves of garlic
3 red chili peppers
5g cumin seeds 
2g coriander seeds 
2g fennel seeds
50ml olive oil
Salt and pepper to taste

I like to first chargrill the peppers on the BBQ, direct heat at 200c, keep turning until you get an even black char all over
Then setting the BBQ up for indirect cooking at 160c place the peppers chilies and garlic on a cast iron roasting tray and cook for a further 30 minutes
Place the garlic to one side
Put the peppers and chilies in a plastic bag while still hot and close the bag, it makes it easier to peel and de-seed
Once they have cooled, remove from the bag and peel and de-seed the peppers
You can also peel the chilies, but up to you if you wish to remove the seeds too
Toast the cumin, coriander and fennel seeds in a pan on a medium heat for 5 minutes
place in a mortar and pestle and grind to a rough powder
Place the peppers, chilies, garlic, oil and spices in a blender and pulse until you get a smooth paste
Season to taste with the salt and pepper
Pour the harissa into a sterile jar and place the lid on, it will keep for two weeks in the fridge

Cooking the wings
Set your barbecue up for dual zone cooking (direct and indirect) at 200c, or oven at 190c fan or 200c normal for those wishing to cook using this method
Oil the wings lightly and place on the griddle on the direct side for 15 minutes, turning halfway through
Baste the wings with the harissa on both sides and then place back on the griddle on the indirect side and cook for a further 20 minutes
If cooking in the oven, place the wings on a baking tray and cook for 35 minutes


Smoked Chicken and sweetcorn soup

Kitchen Exile is 9 years old today, so it's happy birthday to me. 
A lot has happened in the last year the main big change was my move to Poitou Charentes in France. I'm certainly getting inspired by all the wonderful produce in the region. Like any move to a new country, there's always the element of finding your new butcher, grocer, baker, cheese monger and wine merchant and getting to know them and their products. Here in Poitou Charentes there's no shortage of quality ingredients and each new season brings plenty of surprises. The markets here are amazing and it's lovely to see lots of local farmers trading their wares. 
We've got some big changes coming up with our house in the form of renovations and me finally having a decent kitchen. The reason for not posting regularly is that I haven't had a proper kitchen to use and am reliant on a one hob induction plate and my barbecues for cooking. Which has meant getting very creative! The kitchen here is tiny so I haven't been able to unpack a lot of my kitchen equipment. 

Once again a big thank you to all those who have supported me over the past nine years and to all of you who follow me and read my recipes. I hope you've enjoyed them so far and I promise next year I'll be back to posting recipes on a more regular basis. 

So here's a simple recipe celebrating sweetcorn as it's now coming into season, there's certainly plenty of it in the fields in the area. 
Chicken and sweetcorn are a marriage made in heaven, add a little bit of smoke and it amps up the flavour significantly.

2 cloves garlic chopped
1 celery stick chopped
2 chicken breasts skin on
2 husks of sweetcorn 
50ml crème fraiche
1 small onion roughly chopped
1 litre stock
Salt and pepper
Oil for frying
Oak wood chips

Set your BBQ up for dual zone (direct and indirect) cooking at 180c
Add the oak wood chips and wait until you get thin blue smoke
Place the chicken breasts on the direct side and cook for 1-2 minutes each side to get a nice char
Transfer to the indirect side and cook for 15 minutes or until you get a core temp of 65c
Add the sweetcorn on the direct side and cook for 15 minutes turning every 2 minutes to get an even cook
Set the chicken and sweetcorn to one side to cool for a couple of hours and to allow the smoke flavour to infuse
Roughly chop the chicken up
Remove the husks from the corn and cut off the kernels
In a saucepan sauté the onion, celery and garlic until soft
Add the stock, chicken and sweetcorn and simmer for 10 mins
Place the soup in a blender, whizz until smooth and return to the pan
Add the crème fraiche and stir through
Season to taste


Corned beef, not as Irish as you think...

 For this dish, you will need to give yourself a week before you get to taste the results. I tend to use cheaper cuts such as brisket for my corned beef. In this article there's a little bit of history before you get your recipe.


Growing up in Ireland, this is one dish we never actually ate. My first experience of it was when I moved to London and came across salt beef bagels in Brick Lane. 

Corned beef is not and never was never an Irish staple, you may be surprised to hear. In the past beef was considered an expensive commodity and therefore pork, which was cheaper, was more commonly salted. It became popular in America with Irish emigrants as beef was cheaper to buy in the states. It was called "corned" because of the salt kernels used in the curing process. 

Corned beef was produced in some areas in Ireland, but only for export, so may have been eaten in those areas, but not so prevalent. So because of emigrant traditions, in America the dish is associated with Ireland and corned beef and cabbage is a traditional American dish for St Patrick's day. In Ireland however, we're still eating boiled bacon or spare ribs and cabbage. 

Enough of the history lesson and now for the recipes!

The brining is relatively simple as you make a 10% solution, which is 100 grams of salt to one litre of water, and add whatever aromatics you'd like to the brine.The amount of meat you wish to brine is up to you. This time I added cloves, peppercorns and bay leaves. Do make sure the brine covers the meat and it is a good idea throughout the week to turn the once a day in the brine.

One the meat has had at least a week in the brine, you have several options for cooking. The cut of meat is up to you what you would like to use. I tend to go for cheaper and tougher cuts such as brisket.

Slow poach
Cooking it in water and adding aromatics such as bay, thyme, rosemary, cloves etc...
I also like to add onions, garlic and carrots along with the aromatics for more flavour
Poach for at least 3 hours on a low heat
Allow to rest before serving.
Serve American style with boiled potatoes and cabbage or allow to cool and serve with mustard in a sandwich.

Or you can make Corn beef hash with fried eggs and beans

300g cooked salt beef  (I used brisket) - cubed
1 onion sliced
1 clove of garlic grated
1 tablespoon Worcestershire sauce
2 cooked potatoes cubed
1 tin baked beans
2  fried eggs
Oil for frying
Salt and pepper to taste


Fry the onion and garlic till soft and remove to a plate
Next brown off the cubed potatoes and remove to the same plate as the onions
Brown the salt beef
Then add the spuds and the onion back into the pan
Add the Worcestershire sauce and stir
Last add the beans and heat through 
Season to taste and serve with fried eggs on top.


Goat shoulder stew with anchovies

As many of you now know goat is one of my favourite meats and so versatile as it suits so many flavour profiles from Mediterranean to Middle Eastern to Caribbean. The flavour can be compared to that of lamb in it's younger stages and mutton in it's later stages. You can check out the many recipes that I have in my Goatober section here on Kitchen Exile. Many butchers and farmers world wide will be showcasing goat meat during the month of October, so be sure to check out your local producers to see what's on offer. 

300g goat shoulder cubed
10g fresh rosemary sprigs finely chopped
5g fresh thyme chopped
5g chives finely chopped
2 cloves garlic grated
5g fresh parsley chopped
5g fresh mint finely chopped
5g fresh oregano finely chopped
40g anchovies in olive oil finely chopped
2g freshly ground black pepper
150ml white wine
100ml lamb or chicken stock
2 tomatoes finely chopped
20g black olives finely chopped

Mix the goat shoulder with the herbs, garlic, pepper and anchovies and marinate overnight in the fridge
Preheat your oven or set your barbecue up for indirect cooking at 140c
Whizz the tomatoes up to form a smooth paste
Place all the ingredients in a cast iron pan and cook for 3 hours
I like to serve this with either rice, couscous or tabbouleh


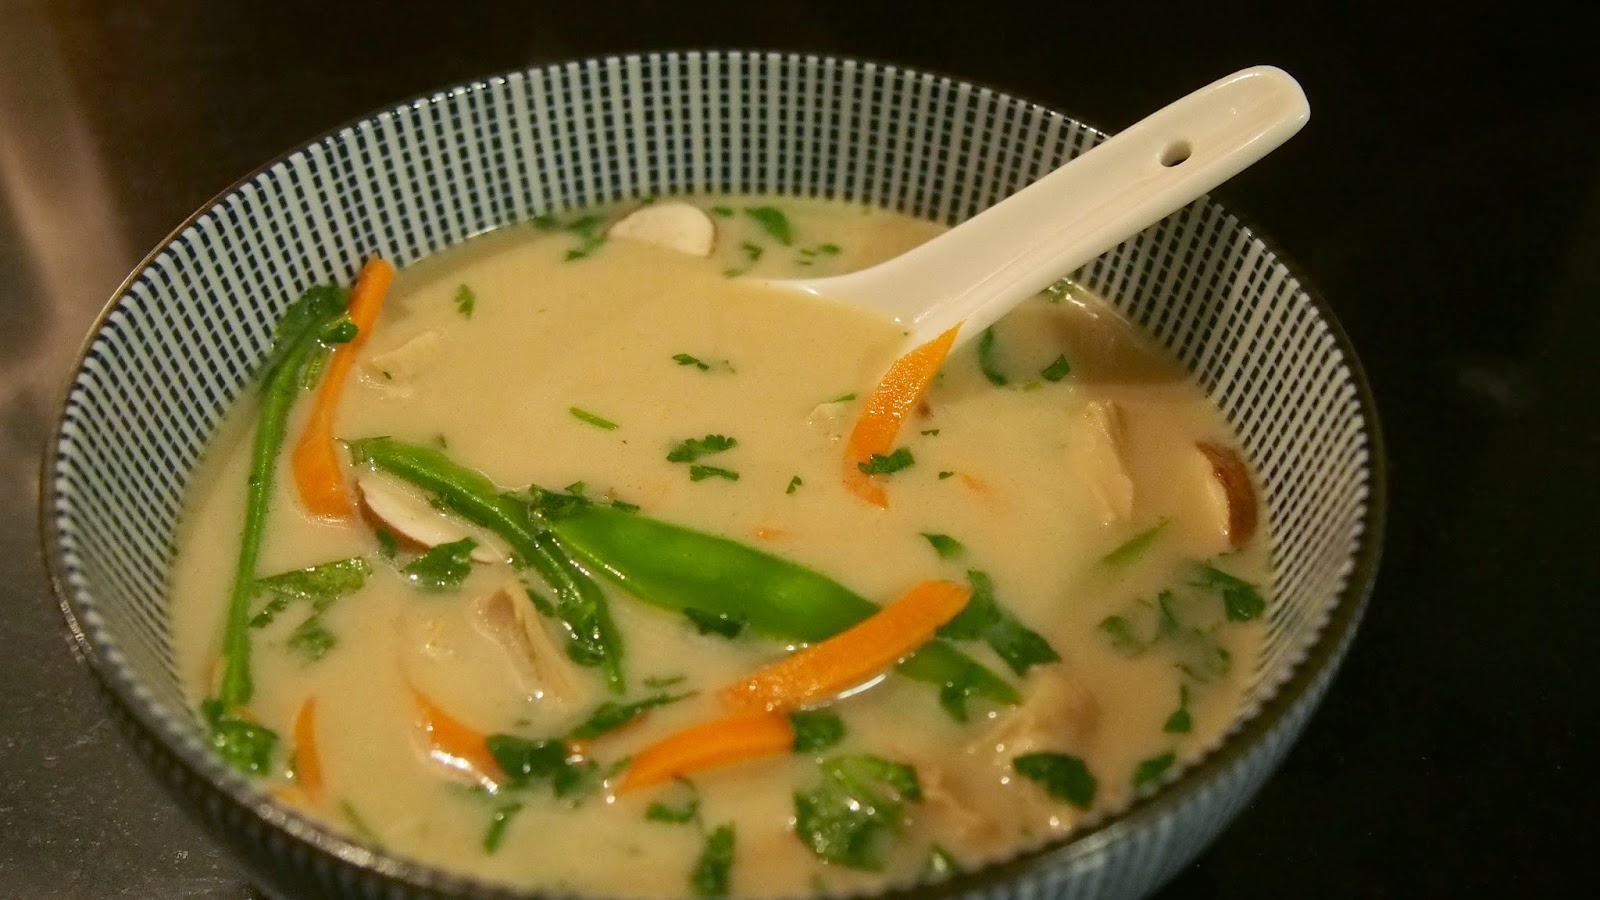
Thai hot and sour soup

I've always had love affair with Thai food, simple fresh, tasty, what more could you want. The great thing about Thai food is its simplicity, but the trick is getting the flavours right. Where the recipes may require quite a few ingredients and the method isn't difficult, the complexity lies within getting the right mix of hot, sour, salty and sweet.

I was lucky enough after my year at Leiths School of Food and Wine to travel to Thailand and experience the food first hand. It was one of the countries that I'd always wanted to visit just for the food and I wasn't disappointed. I also spent a day at the Chiang Mai cookery school and got to meet Sompon Nambian who runs the school and whose TV program I used to follow religiously on a UK TV food channel.

I don't think I can convey enough how much I love Thai food. I'm quite happy to spend a fortune on ingredients to make the paste from scratch (and yes it makes all the difference). I like to make the pastes in a mortar and pestle. A little tip when dealing with fibrous ingredients such as ginger, galangal and lemongrass is to grate them using a fine grater as it means you don't have as many fibres in your paste or curry.
As well as Thai green or red curry I love to make Hot and Sour soup and also a variation with coconut milk. I love this soup and its my go-to when I don't don't feel like strenuous cooking. It is a case of throwing the ingredients in a pot of water and giving it a bit of time and minimal effort to come out with something tasty and rewarding. I usually make the broth the day before and leave all the aromatics in overnight, it makes for a more flavoursome soup.

To make the broth
2 sticks lemongrass, crushed
15g ginger unpeeled
2 cloves garlic crushed
30g coriander stems or roots
2 shallots, quartered
1 tomato quartered
5 Lime leaves
4 mushrooms quartered
2 chillies (red or green)
1 litre of water, chicken stock or fish stock

Place all ingredients into a pan
Add the water or (flavoured if using stock) and bring to the boil and then simmer for an hour on a low heat
Let the broth sit for a few hours with a lid on, or even better overnight, before straining


For the soup
4 Lime leaves
20g coriander chopped
1 Tomato cut into eighths
5 mushrooms thinly sliced
Juice of one lime
10ml Fish sauce
1 red chilli finely chopped
5ml soy sauce
5g palm sugar
Mange tout julienned
1 medium carrot julienned
100ml coconut milk (optional)

You can then add the following dependent on if you are going to make a fish or meat soup

10 uncooked prawns 
Leftover roast chicken breast or thigh (chopped)


Bring the stock to a simmer
Add the tomato, mushrooms, chilli and lime leaves and simmer for 5 mins
Season with the soy, fish sauce, sugar and lime juice (you are looking for hot, sour, salty and sweet so add more of any of the seasoning to get the flavour you want)
Add the prawns or chicken and cook for another 5 mins
If adding coconut milk, then pour it in now and stir through, adjust the seasoning if necessary
Garnish with the coriander


Leftover lamb with curried rice

I love to do a slow cooked leg of lamb on my barbecue, because of the size you have to buy and with there only being two people in our house, there's always leftovers. I do enjoy slow cooking and love the results it yields. Especially with something like lamb, as it will normally come right off the bone with no effort needed to carve. Now I could have gone for the leftover staple of Shepherds pie, but I like my curries and have plenty of spices to play with in my ingredients drawer. Monday's dinner became an improvised "Biryani" with the leftover lamb, the leftover spuds and some rice.


Leftover lamb meat and whatever leftover spuds you may have and chop into chunks
1 onion finely chopped
1 red chilli finely chopped
100g cooked basmati rice
15g garam masala 
Heaped teaspoon cumin seeds
Heaped teaspoon black mustard seeds
Juice half a lemon
Coriander leaves for garnish
oil for frying 
Salt and pepper to season

Sauté the onion and chilli until they are soft and glossy, 
Add the mustard and cumin seeds and cook for one minute
Add the garam masala and about 30ml of water to help cook out the spices and prevent the spices from burning, cook for about 5 minutes
Next add the lamb and cook for about 2 minutes
Then add the potatoes and rice and cook for a further 5 minutes (you could also add some frozen peas at this stage too)
Finally switch off the heat and add the lemon juice, salt and pepper and stir through
Garnish with the coriander


Absinthe mustard grilled chicken thighs

I used to make a lemon and tarragon marinade for chicken when I first started barbecuing many years ago. It was one dish that was always popular with my friends. I decided to visit that recipe again, but wanted to take it a stage further.  While I'm not the biggest fan of absinthe per se, I do like the combination of aniseed flavours with chicken. I came across the absinthe mustard in a local French traiteur and thought it would be interesting to try. There's a lot going on flavour wise with these chicken thighs but they do work well together. The mustard, honey and tarragon provide a great background flavour while the lemon zest just lifts it further. Add some wonderful smoky flavour from the barbecue and you're set!

4 chicken thighs flattened to ensure even cooking (you can use a rolling pin to do this)

Marinade
10g Absinthe mustard or 10g dijon mustard mixed with 5ml absinthe or pastis
10ml olive oil
2g dried oregano
2 cloves garlic grated
5ml honey
Zest from half a lemon
2g dried tarragon
Salt and pepper to taste

Mix all ingredients together bar the salt and pepper
Place the chicken thighs in a dish and pour over the marinade, ensure they are well covered on both sides
Place in the fridge for 6 hours 
Set your barbecue up for direct cooking at 220c
Cook the thighs for 2 minutes each side
Allow to rest in a warm place before serving, season to taste

Slow roast tomato and red pepper soup

Another one of my oldie but a goodie recipes. I first made this for a picnic years ago. This wasn't just any old picnic but one at Glyndebourne, so the picnic was during the interval of an opera in the grounds of a stately home. It was a formal back tie affair and I was kinda nervous as I was cooking for my other half's family for the first time, so no pressure then! So if you want something that works well both as a warm or chilled soup, then this will earn you brownie points. This recipe works well being prepped on the BBQ as the coals give the tomatoes that smoky edge and a little extra sweetness. 


12 tomatoes
2 red peppers
1 red onion
4 cloves of garlic
10 sprigs of thyme
1.5l vegetable stock
Olive oil
2 tablespoons tomato purée
100ml crème fraiche
Juice half a lemon
Salt, pepper and sugar to taste

For those of you who like their soup a tad spicier, you can add a red chilli (or 3) to the roasting pan with the veg.

Half the tomatoes, quarter the pepper and onion and place in a roasting tin along with the peeled cloves of garlic
Lightly drizzle with oil and sprinkle the thyme over
Roast in a low oven or BBQ (indirect) for 2 hours at 120c
Remove the thyme sprigs before placing the contents in a pan
Add the vegetable stock and tomato purée and stir
Bring the soup to the boil, and then simmer for 10 minutes
Once cool, blend the soup until smooth
At this stage you can sieve it to give a smoother soup, or leave as is for a rustic soup
Add the crème fraiche and whisk in
Stir through the lemon juice and sugar and season to taste with the salt and pepper

Mango and coconut baked cheese cake

I'm a huge fan of mango, coconut and baked cheesecakes, so it was only a matter of time before I combined them all together. This is my summer tropical style dessert, quick and easy to make and tastes fantastic (it has been taste tested thoroughly). The biscuit base holds the coconut component and the cheese cake topping has the mango component. I've added lime juice which heightens both the flavours. 

Base
10 digestive biscuits
50g desiccated coconut
90g butter
50g brown sugar

Whizz the digestives, sugar and the coconut together in a food processor until they resemble a sandy crumble
Melt the butter in a pan, add the rest of the ingredients and stir to incorporate
Place the mix into a lined cake tin and pat down well
Place in an oven at 190c (fan) 200c (normal) for 15 minutes
Allow to cool fully before adding the topping


Topping
300g fresh or tinned mango, roughly chopped
Juice of one lime
600g cream cheese (room temp)
125ml crème fraiche (room temp)
2 eggs
90g caster sugar
80g plain flour
Pinch of salt

Place all the ingredients into a food processor and pulse until well combined
Pour the cheese filling into the baking tin with the base mixture
Bake at 190c (fan) 200c (normal) for an initial 15 minutes and then at 120c (fan), 130c (normal) for a further 45 minutes until just set
Turn off the oven and leave in the residual heat for a further 30 minutes, with the oven door slightly ajar
Remove from the oven and allow to cool before serving

Tabbouleh

This is one of my summer favourites a great side dish or sometimes I'm quite happy to eat it by itself. It's such a great fresh dish. I came across this dish many years ago at a Turkish restaurant called Haz in the city in London. It was always on the menu as a starter (and having just checked their menu it still is) and was one of my favourites to order. It always evokes memories of walking past the restaurant on the way to work and smelling the charcoal grills firing up before service, the food there was simple but very tasty indeed. It is one of the many places I miss in London. Another great thing about this recipe is the simplicity, tomatoes, onions, bulgur wheat and herbs with lemon juice and olive oil. No cooking involved at all. When tomatoes are in season I cannot make this enough and it makes a great barbecue side dish especially for Mediterranean style grilled meat dishes. This is my take on that dish I enjoyed all those years ago. This serves four people as a side dish.

70g bulgur wheat
3 tomatoes finely chopped
15g red onion finely chopped
10g flat leaf parsley finely chopped
10 mint leaves finely chopped (optional)
10g coriander finely chopped (optional)
Juice of half a lemon
Salt and pepper to taste
10ml extra virgin olive oil

Place the bulgur in a pyrex bowl, add the olive oil, salt and pepper and stir to combine
Pour over just boiled water until it is covered
Cover the bowl with cling film and leave to one side for 30 minutes, the bulgur will soak up all the water
Allow to cool before adding the rest of the ingredients
Once cool, mix all the ingredients together and add the lemon juice
I like to serve this with koftes or grilled meats as a side

Grilled white asparagus with brown shrimp and a lemon, tarragon dressing

A simple combination of flavours is all that is needed to give you a delicious dish. Not all recipes need to be complicated. Asparagus benefits from being grilled as it enhances its natural sweetness, combine this with equally sweet shrimp and a citrussy dressing and you're almost there. The aniseed notes from the tarragon give it the depth it deserves. 

10 white asparagus spears, peeled and woody ends cut off
200g peeled and cooked brown shrimp
5ml oil
Salt and pepper to season

Dressing
20ml rapeseed oil
20ml lemon juice
2g dried tarragon

Place all dressing ingredients in a jam jar and shake well

Set your barbecue up for direct cooking at 220c
Brush the asparagus with oil
Cook the asparagus for 5- 10 minutes depending on the thickness, ensure you keep turning the asparagus every minute or so to ensure an even cook
Test the asparagus for doneness by piercing with a knife, if it goes through easily then it is ready
Place on a plate and season with the salt and pepper
Sprinkle over the shrimp and then pour over the dressing

Lamb heart burger

Lamb heart meat has a wonderful flavour and works really well in this burger recipe. Many of you know that I'm a fan of offal and like to use the "not so typical" cuts of meat.  I'm lucky that I have a wonderful local farmer where I can get these cuts of meat. Best to ask your butcher for lamb heart as it's not commonly sold. This is a lovely delicately spiced burger and a perfect foil for that "something a little different" to add to your repertoire. Lamb heart does not require much in the way of cooking as it will become tough and chewy. It's best to keep your burger medium rare or medium. I've used lamb neck for additional flavour but you can also use leg or shoulder, do ensure that you have minced these cuts finely. 

300g Lamb hearts finely minced, do not remove any fat
200g lamb neck finely minced
1 red onion peeled and grated (wring out any excess moisture with a kitchen towel)
2cm piece of ginger grated
2 cloves garlic grated
5g garam masala
2g smoked maldon sea salt
5g coriander leaves finely chopped
10g sweet paprika
10ml Greek yoghurt

This makes about 4 burgers

Place all the ingredients together in a bowl and mix well
Place in the fridge for 6 hours to allow the flavours to come together
Remove from the fridge and form into burger patties ( roughly 150g each), place back in the fridge for 3 hours to firm up
Set your barbecue up for direct cooking at 200c
Cook the burgers for 2-3 minutes each side, aim for 54c core temp
I like to serve these with grilled onions, tomatoes and a yoghurt and coriander dressing


Beef cheek tortillas

I love low and slow cooking especially with not so popular cuts of meat. Beef cheek is perfectly suited to slow cooking and really takes on flavours during the process. This is one dish that needs very little attention, just get it on the barbecue and you can pretty much forget about it until it's ready. I tend to go by eye and feel when cooking for long periods rather than core temperature. The beef cheek just falls apart when ready and perfect for serving in tortillas with some salsa and guacamole. As many of you know now I tend to make my own spice rubs, I want to have something that compliments the meat not drowns out the natural flavours. 

500g beef cheek whole, trim off excess fat
Juice 1 orange
Juice 1 lime
10ml rapeseed oil
100ml freshly brewed strong coffee cooled

Spice mix
2cm cinnamon stick
2g all spice berries
5g cumin seeds
2g coriander seeds
2g black peppercorns
5g oregano
5g smoked paprika
5g sweet paprika
5g guajillo chili powder
2g maldon sea salt

Place the cinnamon, all spice, peppercorns, cumin and coriander seeds in a heavy based pan and toast on a medium heat for 5 minutes
Allow to cool and then place in a spice grinder and grind to a fine powder
Pour into a bowl and add the rest of the ground spices, salt and oregano, mix together well
Add the fruit juices, coffee and oil and mix further
Place the beef cheek in a deep baking dish or cast iron pan and pour over the marinade
Cover with cling film and place in the fridge over night or a minimum of 12 hours
Ensure you turn the beef during this time to ensure an even coating of marinade
Remove the beef from the fridge an hour before cooking
Set your barbecue up for indirect cooking at 140c with additional wood chips such as hickory or pecan for extra flavour
Remove the cling film from your dish/pan and place it on the barbecue, you'll be cooking the beef in the marinade
Cook for a minimum of 4 hours, cook for 2 hours uncovered and them cover the dish with tin foil and cook for a further 2 hours
Start checking the beef from about 3 hours to see if the meat is starting to give/become tender
Once cooked remove to a warm place and allow to rest for at least 45 minutes
After it has rested you can pull the meat apart quite easily
I like to serve this on warm tortillas with salsa and guacamole


Grilled Lamb Steaks Tandoori Style

I love tandoori style dishes in particular lamb chops. This recipe is perfect for the barbecue, the flavour of the rub accentuated by the smokiness of the barbecue. Add a little char from the grill and it all comes together quite nicely. 


Serves 2 people
6 lamb steaks or lamb chops if you prefer
30g tandoori spice rub ( you can find my recipe here)
10ml oil
70ml Greek yoghurt
Juice of half a lemon
1g maldon sea salt

Mix the rub with the yoghurt and rub over the steaks,
Place the steaks for 6-12 hours in the fridge
Allow the steaks to come up to room temp before cooking
Season with salt and lemon juice
Oil the steaks before putting on the BBQ
Set your barbecue up for direct grilling at 220c
Cook the steaks for 1-2 minutes each side, I like mine rare, if you prefer yours a little more well done then cook a little longer

Paella

Paella is a dish that is versatile and moves with the seasons, it can be meat, veg or fish based or all three. It's a great dinner party dish. I first ate Paella in France about 22 years ago. An odd place to first eat Spanish food but it was cooked by a couple of Spanish guys. During my years at university some friends had a year out in Rennes, so I spent a lot of time going over and back visiting them. 


During this time the people I met came from all over Europe and we often got together to eat at one another's apartments. I used to look forward to going to the Spaniards for dinner as they would cook these amazing paellas on huge pan with all sorts of ingredients. It was placed in the middle of the table and everyone helped themselves.

The market in Rennes (back then, not sure what it is like now) was an every day market and you were spoilt for choice for fresh and seasonal ingredients. I used to love wandering around planning my menu for the evening as I saw what was available that day in the market.

So here's my trip down memory lane.

4 rabbit legs or if you can't easily get rabbit, chicken thighs on the bone will suffice
2 cloves garlic chopped
100g chorizo sausage sliced
200g paella rice
100g tinned tomatoes or three fresh tomatoes finely chopped
10g tomato purée
2g saffron soaked in 10ml water
50ml madeira wine or 50ml white wine
400ml chicken/veg or fish stock
3 sprigs of thyme
1 bay leaf
1 onion finely chopped
10 ml lemon juice
Salt and pepper to season
Oil for frying

Fry off the onion and garlic in the oil on a low heat until soft 
Add the chorizo and fry off until the chorizo starts to release its oils
Add the tomato purée and cook for 1-2 mins
Add the Madeira or wine and cook on a high heat for 1 minute
Next add the tomatoes and the rice and stir for 1 min
Place the rabbit in the pan and pour over the chicken stock, add the thyme and the bay leaf
Give the pan a quick stir and then leave on a gentle heat for 30 - 40 minutes 
Season to taste and serve
This dish also works well on the BBQ as it will infuse with the smoky flavours from the coals
Set your BBQ up for indirect cooking at 150c and cook for 30 - 40 minutes
I like to leave the pan in the middle of the table and people help themselves


Pit Beans

I do like my beans and this is a great recipe for using up any leftovers after a barbecue. Not that we have much in the way of leftovers afterwards, you can even make this with just the beans and sauce if you like. I get to have this dish all to myself as my other half is as I like to call him," a bean hating heathen". 
Ideal meats to use for this dish are wings, ribs, smoked sausage, pulled pork or brisket. You can also serve this with a good old fashioned cornbread or on top of a baked potato. This makes enough for 4 main course servings or 8 side servings. 

200g black beans tinned (drain off excess liquid)
200g lima beans tinned (drain off excess liquid
400g tinned tomatoes
10g pit bean spice mix (see below)
15ml maple syrup
20ml apple cider vinegar
15ml chipotle in adobo
10g tomato puree
10ml soy sauce
5ml Worcestershire sauce
2 cloves garlic
1 large red onion finely chopped
2 cloves garlic finely chopped
1 stick celery finely chopped
10g pork fat or 10ml sunflower oil
300g leftover barbecue meats (chicken wings, ribs, brisket, pulled pork etc...)

Pit bean spice mix
2g of each -  ancho chili flakes, coriander seeds, achiote seeds and allspice berries
1 inch stick cinnamon or cassia bark
5g dried oregano
5g smoked paprika

Toast the chili flakes and whole spices in a pan for 5 minutes, allow to cool and place in a spice grinder and grind to a fine powder
Place in a bowl and mix through the oregano and smoked paprika

Beans
Set your barbecue up for direct cooking at 170c
Using a cast iron or heavy bottomed pan add the onions, garlic and celery and fry off in the pork fat for 15 minutes until the onions are soft and glossy
Add the chipotle and puree and fry for a further 2 minutes
Add the pit bean spice mix and cook for a further 5 minutes
Add the tinned tomatoes, maple syrup, vinegar, soy sauce and Worcestershire sauce and stir through
Cook for a further 20 minutes
Add the meat and beans and cook for another 15 minutes
Serve and enjoy!